LEARN MORE ABOUT OUR 3D TERRAIN MAPPING FEATURE

Survey your job site in True X,Y,Z format. Then upload the csv or dxf directly into cad for amazing designs!

Basic Operation


  1. Survey the area’s perimeter. This clearly establishes your working area. The red line defines the perimeter/working area. You need a minimum of 4 points but can add perimeter points anywhere the linear plane changes, dips or hills. There is no maximum number of perimeter points.
  2. Add interior and exterior points only when needed to map hills or dips. Too many points get confusing. 
  3. Save into folders and name survey.
  4. You now have standalone data or you can email and upload into CAD.
  5. After uploading initial survey, overlay a drone or aerial image for stunning results.
  • Slide title

    Write your caption here
    Button

3D BUTTON FUNCTIONS

  1. Mark or plot a point.
  2. Undo last point.
  3. Add comments.
  4. Add photos.
  5. Close the perimeter. This gives your working area. After closing the perimeter, you may add points inside or outside of the perimeter as terrain dictates.
  6. Save survey in folder and file.

A Few Quick Notes:


  1. This system was designed to operate in IOS. Android operates differently, see additional notes for Android operation. See equipment specs to make sure you have the right IOS system and you are up to date on upgrades. 
  2. Learn the system before using it professionally. Don’t start learning on an active job site. Make sure you understand the basics before surveying a “real job”.
  3. Troubleshooting. Be ready to send videos. A video shows exactly what is happening without having to learn the “language” of mapping. This is a huge time saver for both user and tech rep. See FAQ button on the home screen of your app for more helpful tips. 


GETTING READY TO START:

  1. Make sure you have good batteries, and your phone is connected to the level. 
  2. It is much easier to connect the level to the monopod, and the phone to the level via a magnet mount. 
  3. Move in a smooth consistent fashion as straight from point to point as possible. Don’t zig-zag. Don’t carry the phone away from the level.


Basic Mapping: SMART LEVEL - 3D Terrain Mapping - YouTube This survey took 3 minutes. 


Upload into CAD: SMART LEVEL - Uploading Field Data into Uvision CAD - YouTube This upload took 4 minutes. 

Android version: Image Mapping combined with 3-D Terrain Mapping

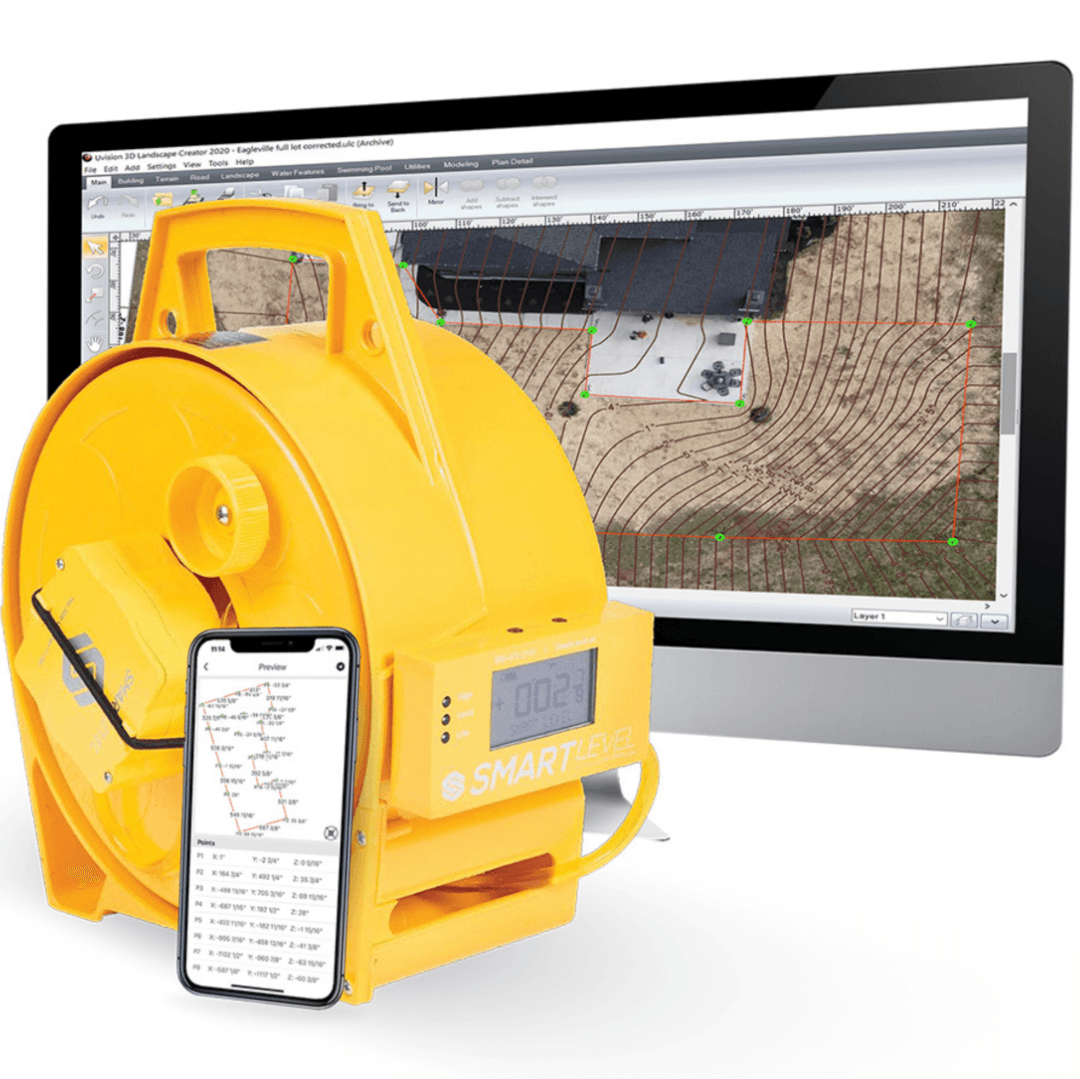
The newest Smart Level Android App with Image and 3-D Terrain Mapping is now public: Smart Level - Apps on Google Play  or  U-Level - Apps on Google Play There are a lot of different android phones out there so we will have a few adjustments to make as we introduce this newest version.


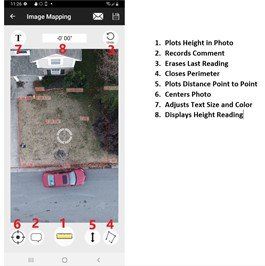
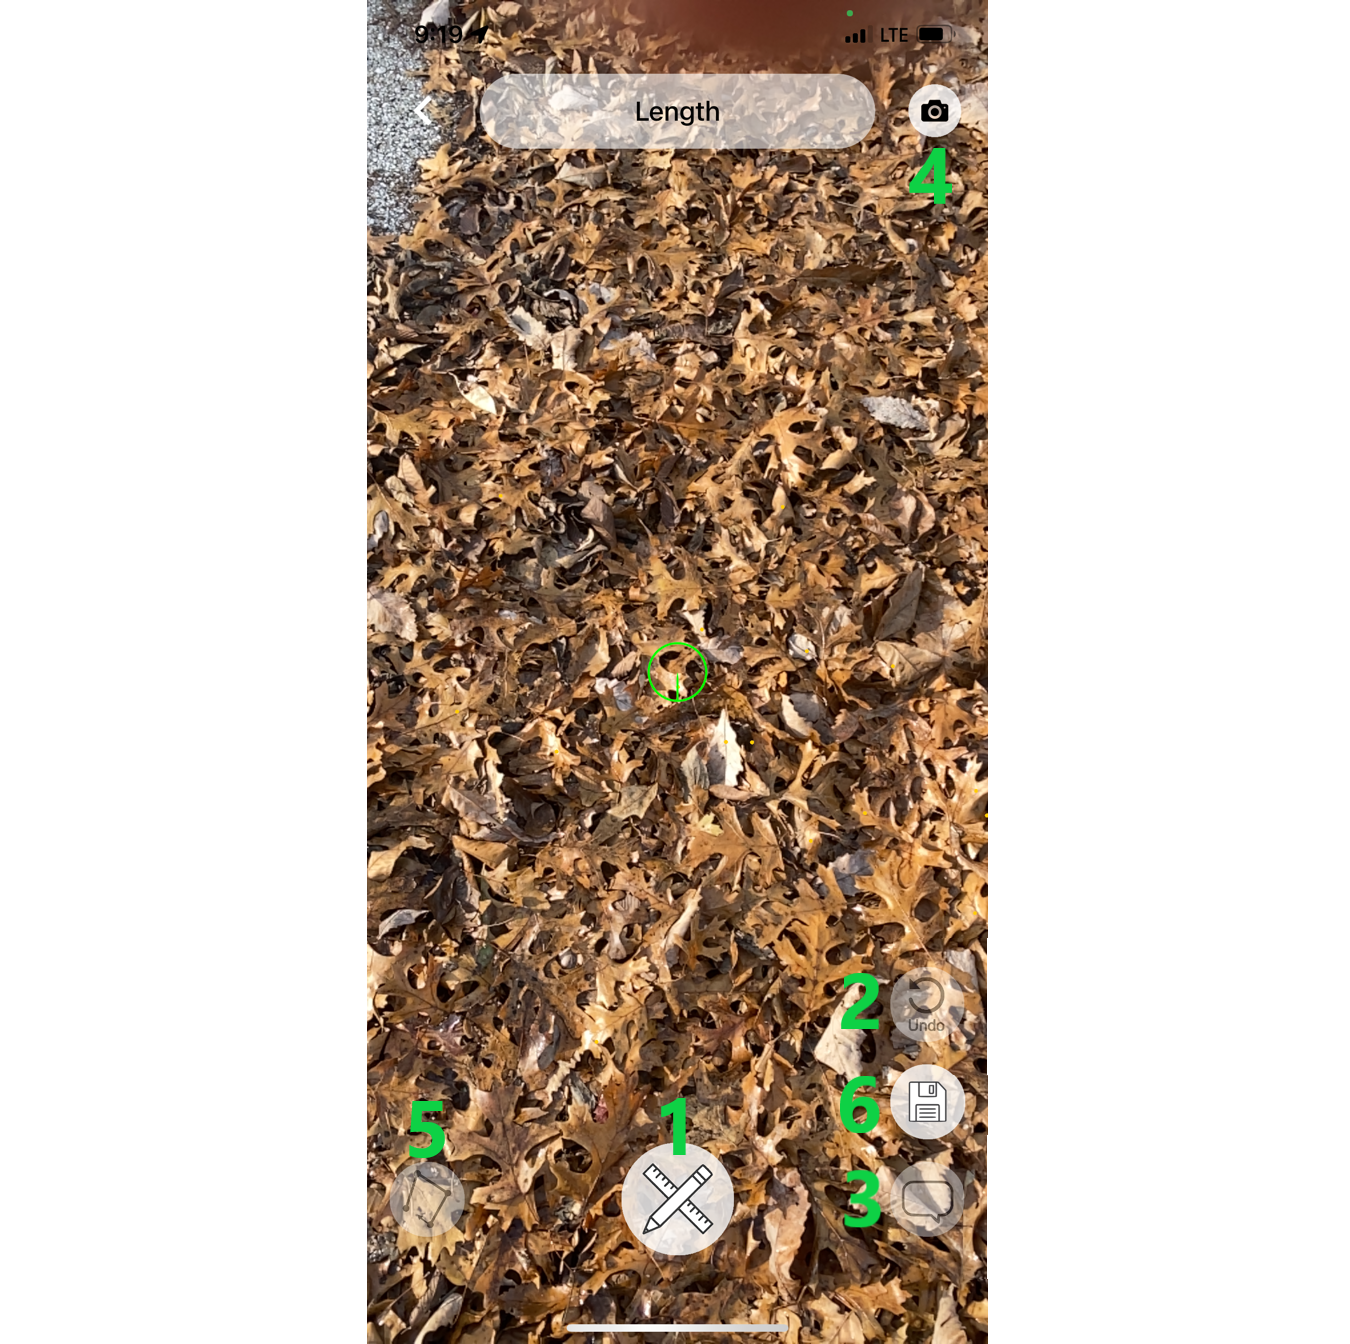
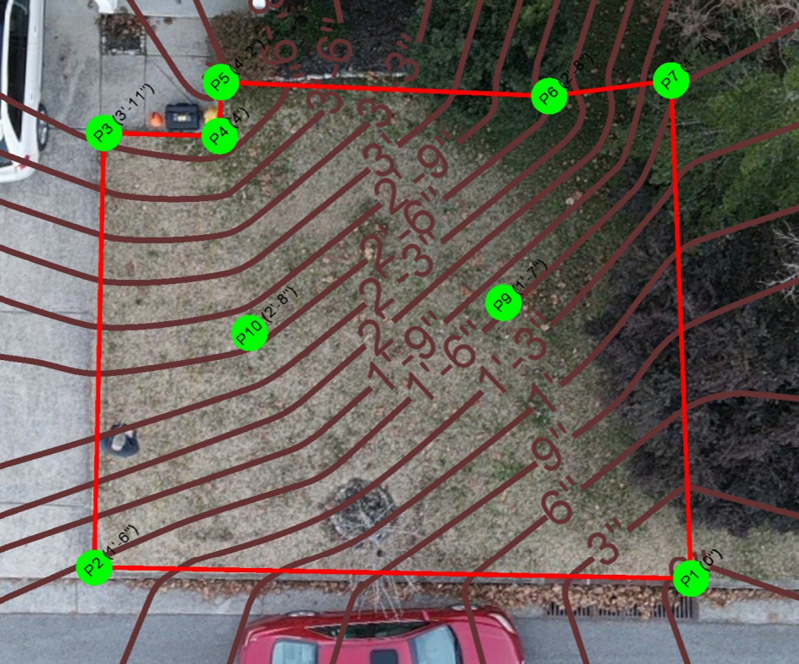
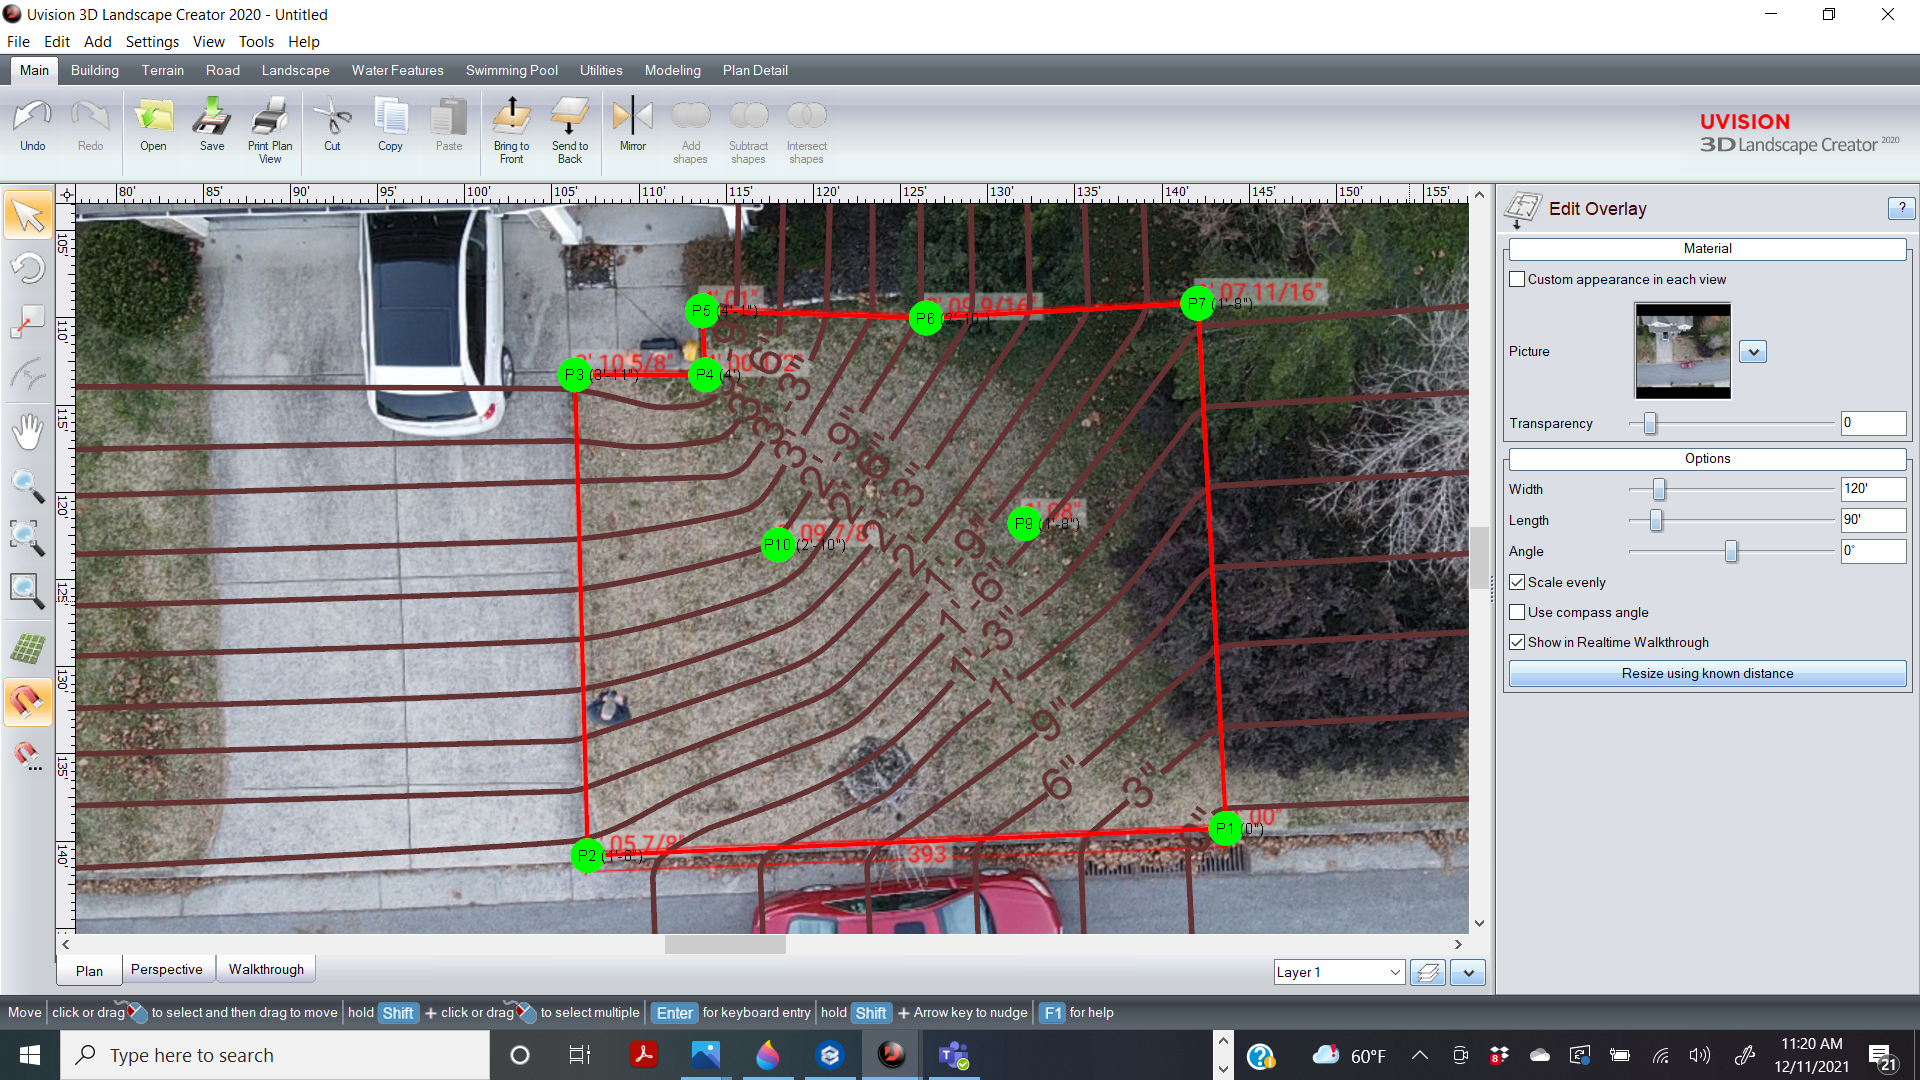
Android Image Mapping operates the same as IOS in creating a jpg image with the measurements quickly and easily. However, android takes Image Mapping to the next level, (pun intended). In android the Image Map also creates the XYZ survey in a csv file ready for upload into CAD. This is of course a very easy method to create a CAD survey of a job site. The downside is you need an overhead photo such as a drone image. And the image needs to be taken at a 90 degree angle, (straight overhead), to the job site.

WATCH THE TUTORIAL VIDEO

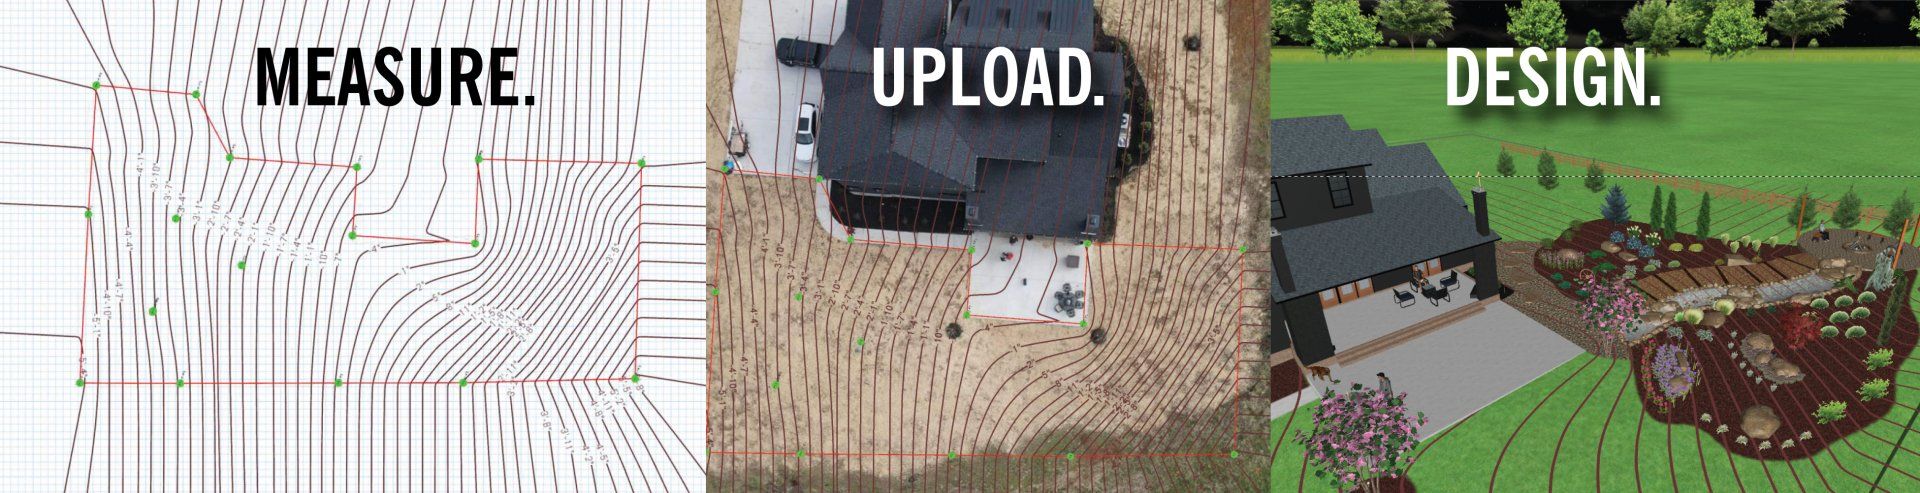
This survey was mapped with Android

MAPPING BUTTON FUNCTIONS

GETTING READY TO START:

  1. Make sure you have good batteries, and your phone is connected to the level. 
  2. It is much easier to connect the level to the monopod, and the phone to the level via a magnet mount. 
  3. Move in a smooth consistent fashion as straight from point to point as possible. Don’t zig-zag. Don’t carry the phone away from the level.


Basic Mapping: SMART LEVEL - 3D Terrain Mapping - YouTube This survey took 3 minutes. 


Upload into CAD: SMART LEVEL - Uploading Field Data into Uvision CAD - YouTube This upload took 4 minutes. 

Share by: